June 19, 2026
Install neuro-san and Create Your First Project in Less Than 5 Minutes

Install neuro-san and Create Your First Project in Less Than 5 Minutes
Getting started with neuro-san just got a lot faster. Here's everything you need to go from zero to a running agent network in minutes.
Setting up a new multi-agent project in neuro-san used to mean wiring up dependencies manually, and navigating configuration files before you could run a single agent. That process worked, but it added real friction, especially for developers who just wanted to get something running and explore what neuro-san could actually do.
That has changed. Today, neuro-san-studio is available as a Python package on PyPI, making installation and project setup significantly simpler. Create a project, install the package, run a single initialization command, and you're ready to go. The ns command-line tool handles LLM provider setup, project scaffolding, and launch, reducing what was once a multi-step process to just a few minutes. From a blank terminal to a running agent network, the entire setup takes less than five minutes.
What Changed: From Git Clone to PyPI
The biggest change is how neuro-san-studio is installed and managed. Previously, getting started meant cloning the GitHub repository and maintaining the setup yourself. While functional, that approach required managing local paths, keeping repositories in sync, and working through onboarding steps that weren't optimized for first-time users.
Now, neuro-san-studio is distributed through PyPI as a standard Python package. Installation, initialization, and updates follow familiar Python development workflows, while the ns CLI handles the rest. A few things are now dramatically simpler:
No repository cloning required. Install the package, start building.
The ns init command walks you through LLM provider selection and scaffolds your project structure automatically, including your config, MCP, and registries folders.
Upgrading is a single command, just like any other Python dependency.
The developer UI (nsflow) launches with ns run, no extra setup needed.
Importing and exporting agent networks and their dependencies.
The result is a smoother onboarding experience and a setup process that feels native to modern Python development.
What You'll Need Before You Start
Just two things:
uv, a fast Python package and project manager built by Astral. If you don't have it yet, install it from docs.astral.sh/uv.
An API key for at least one LLM provider (ie. OpenAI, Anthropic, or Google Gemini). For other LLM providers, refer to the User Guide
That's it. No existing Python environment to configure, no repo to clone.
Step-by-Step Installation: From Zero to Running An Agent Network
Step 1: Create your project folder
Start by creating a new directory for your project and navigating into it:
mkdir my_project
cd my_project
Step 2: Set up your virtual environment and install neuro-san-studio
Create a virtual environment, initialize a git repo, and install the package:
uv venv
source .venv/bin/activate
uv init
uv add neuro-san-studio
That installs neuro-san-studio from PyPI and makes the ns CLI available in your environment.
Step 3: Initialize your project
Run ns init to scaffold a full neuro-san project:
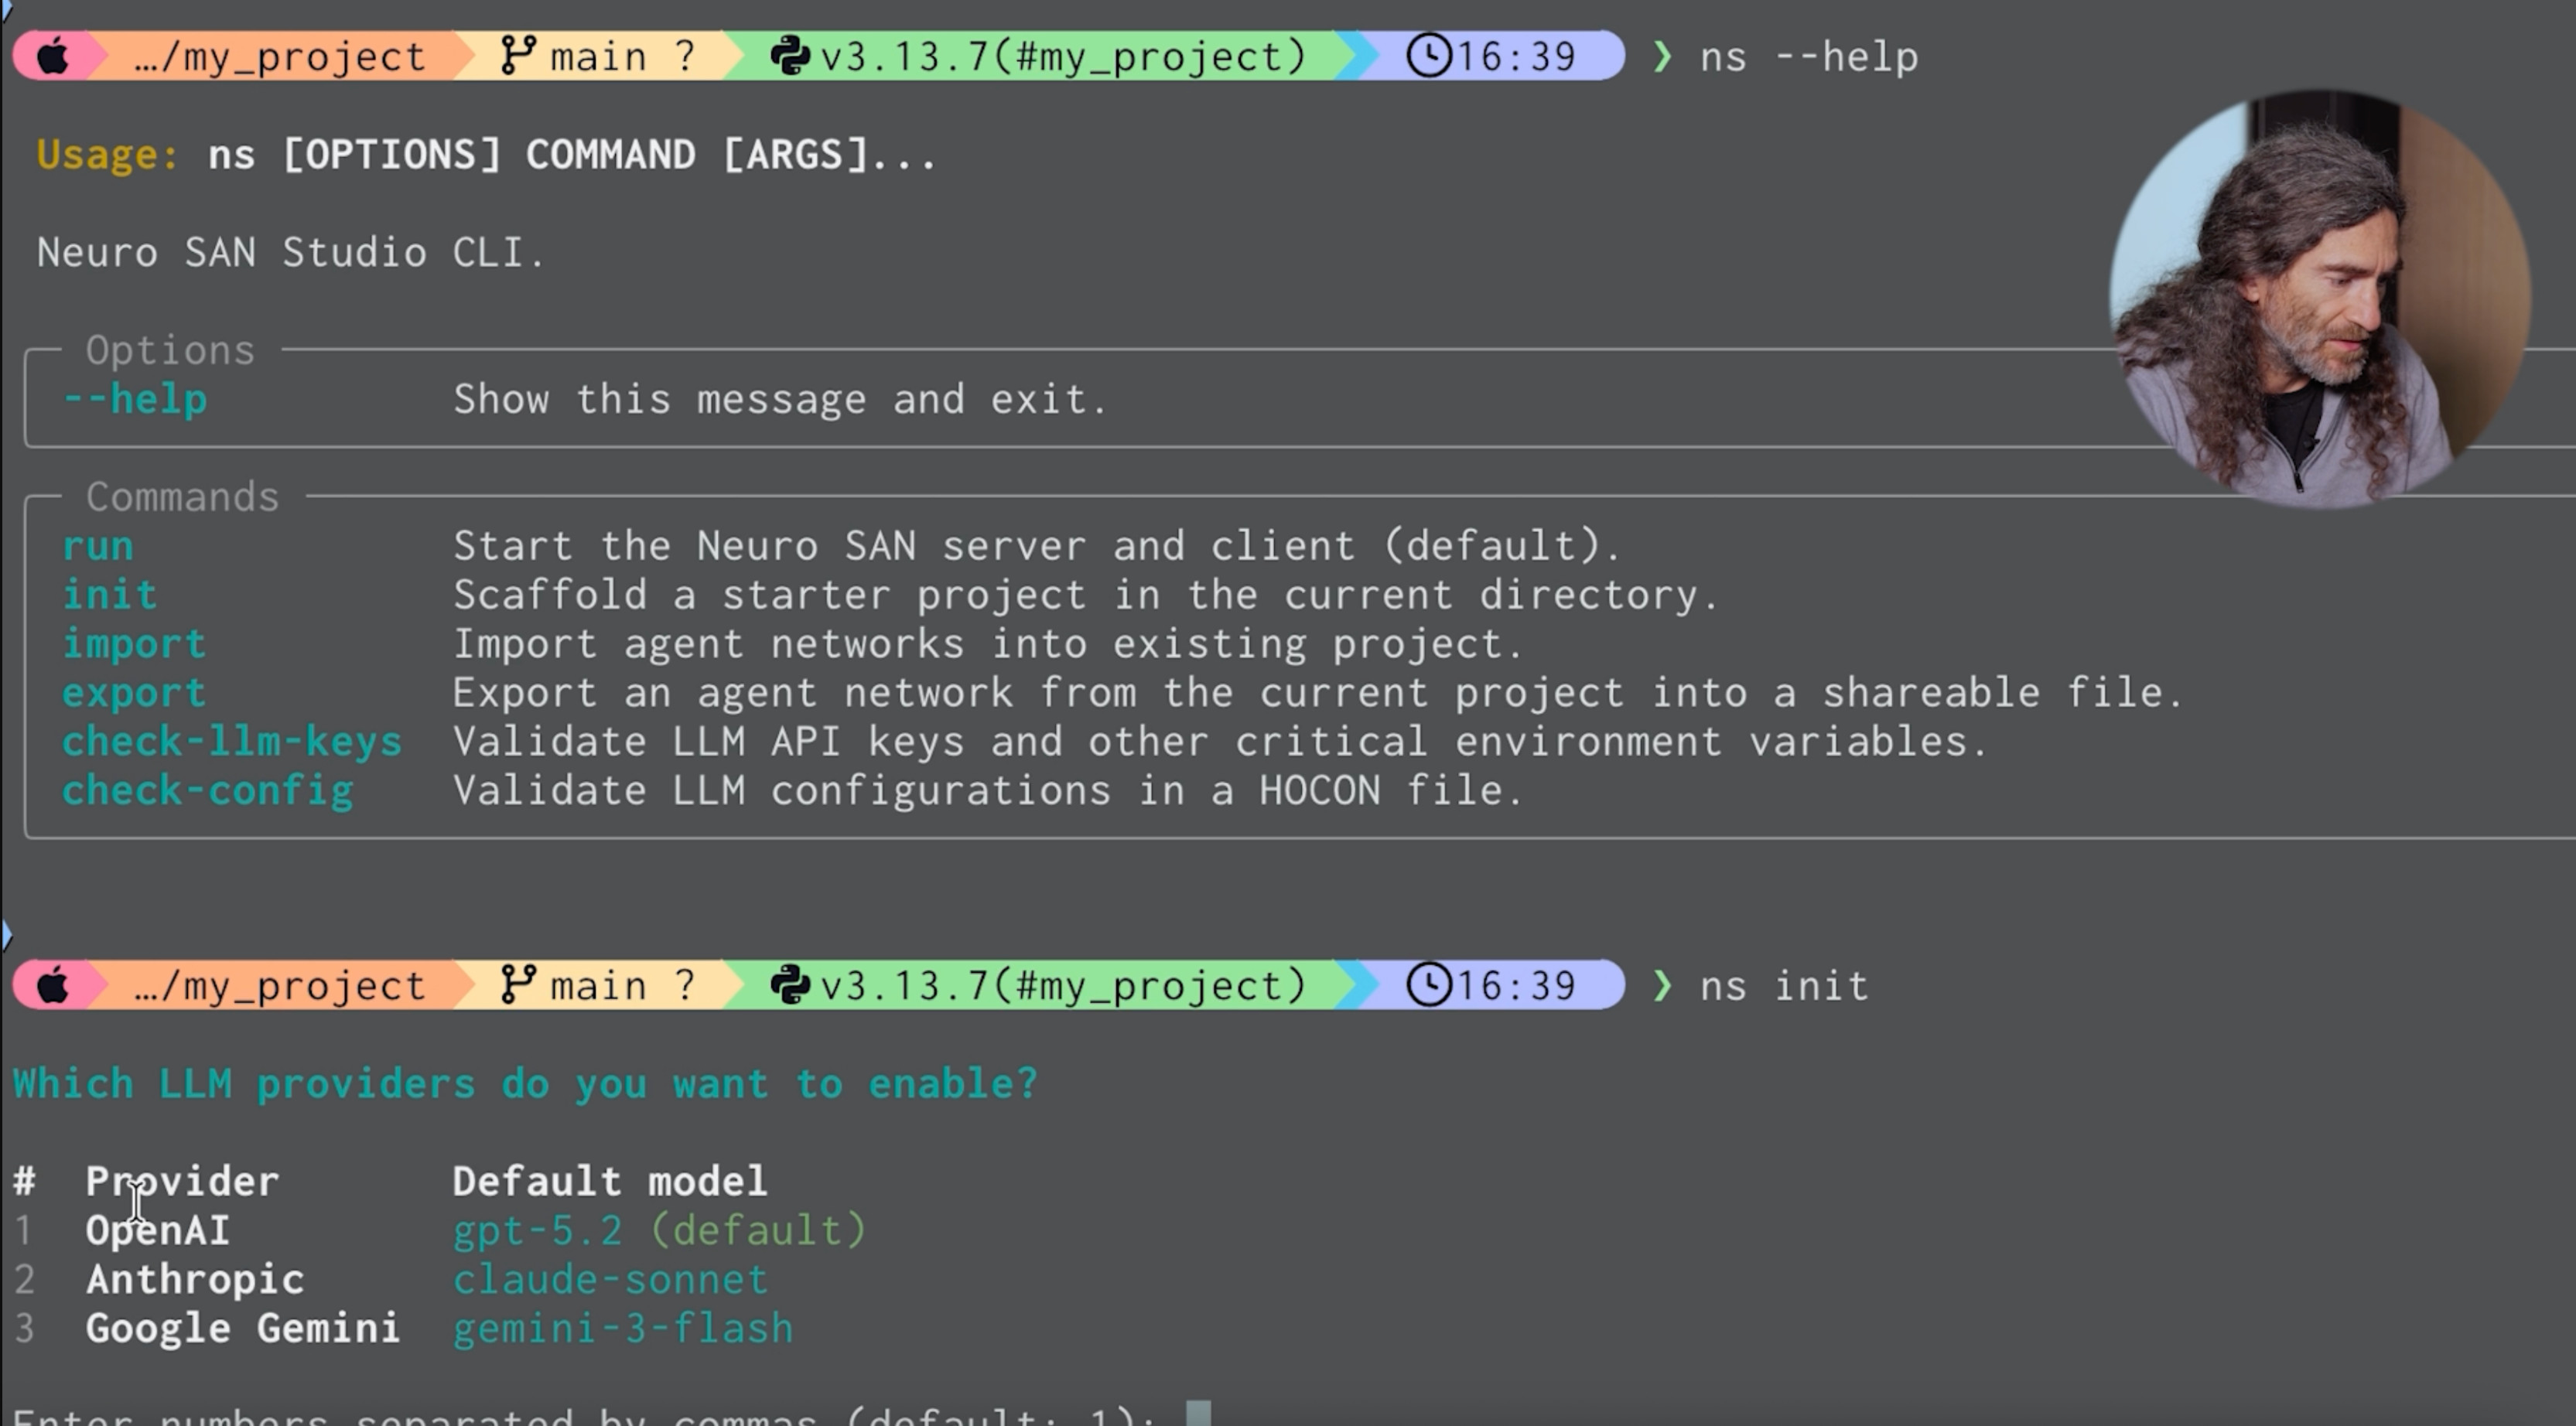
ns initYou'll be prompted to choose your LLM provider:
Which LLM providers do you want to enable?
#  Provider       Default model
1  OpenAI         gpt-5.2 (default)
2  Anthropic      claude-sonnet
3  Google Gemini  gemini-3-flash

Enter numbers separated by commas (default: 1):
Once you select a provider, ns init creates:
• config/ with your LLM model and plugin configuration (see the user_guide for custom configurations)
• mcp/ with a list of available MCP tools
• registries/ with a simple starter agent network ready to run
Step 4: Check your LLM keys and config
Before running anything, verify that your API keys are set correctly:
ns check-llm-keysThen confirm your LLM configuration file is working:
ns check-configIf everything is configured correctly, you'll get a "hello" response from your selected LLM. That's your signal that the system is ready.
Step 5: Import example agent networks (optional but recommended)
neuro-san-studio ships with a library of ready-to-use agent networks. Run ns import to browse and pull them into your project:
ns importAn interactive prompt lets you choose from categories including Basic, Experimental, Industry, Root, and Tools. Selecting Root imports the Agent Network Designer, which is a great tool to generate and edit agent networks.
Step 6: Launch the developer UI
Start the nsflow developer interface with:
ns runYour agent network is now running. From here, you can start customizing your agents, connecting them to real data sources, coded tools, and MCP servers.
Staying Up to Date
Since neuro-san-studio is a proper PyPI package, upgrades are straightforward. When new versions are released, you update like any other dependency:
uv add neuro-san-studio --upgradeNo repository pulls, no manual merges. Just one command and you're on the latest version.
What's Next
Now that your project is initialized and running, you have everything you need to start building with neuro-san. Here is what the typical path forward looks like.
Start with the Agent Network Designer to vibe code a network: Open the nsflow UI, navigate to editor mode, and describe a use case in plain language. The Agent Network Designer will generate a working agent network from your description, including specialized agents, their responsibilities, and how they communicate with one another. You do not need to write any orchestration code to get something running.
Refine your network: Once you have an initial network, use editor mode to adjust it. Add or remove agents, modify what each one is responsible for, and connect tools or MCP integrations as your use case becomes more specific. These changes happen at the structural level in the HOCON configuration, so the network stays readable and easy to maintain as it grows.
Test before you ground: Before connecting agents to real data sources or APIs, use the neuro-san testing framework to evaluate how your network behaves across repeated runs. The framework supports language-aware validation, structured output checks, and comparison across different LLMs. This gives you confidence in the system's behavior before it touches production data.
Ground your agents in real data: When your network is behaving consistently, replace placeholder behaviors with real integrations. Connect agents to internal documents, databases, APIs, or external agent ecosystems. neuro-san supports Python-based coded tools, LangChain, MCP, and interoperability with platforms like Agentforce, CrewAI, and ServiceNow.
The neuro-san-studio repo on GitHub includes additional documentation, examples, and a full library of pre-built agent networks to help you move quickly. You can also run ns --help at any point to see the full list of available commands.
For more installation details, explore the official guide.
Get started with neuro-san-studio today, star the repo, and build a multi-agent system.

AI engineering expert in decision optimization and multi-agent systems, leading AI for Good initiatives